These fluffy, delicious Cloud Eggs are perfect for anyone looking to enjoy a nutritious, high-protein breakfast with a twist. An excellent to-go breakfast idea the whole family will love.

Cloud Eggs are taking the breakfast world by storm! Whether you're a fan of light, airy dishes or are simply looking to try something new, cloud eggs are the perfect way to elevate your morning meal. They are my new favorite healthy breakfast recipe and they are SO simple and quick to make.
These would be amazing for a brunch you might be hosting or attending too. If you're going to a potluck, these will most definitely knock everyone else's meal out of the ballpark. Nothing even compares!
https://www.jillianshealthfuleats.com/mashed-avocado-omelette/I had leftover mushrooms from my mushroom burgers I made the other night so I decided to use them in these cloud eggs. Mushroom Burgers - use this link to find the recipe for the mushrooms.
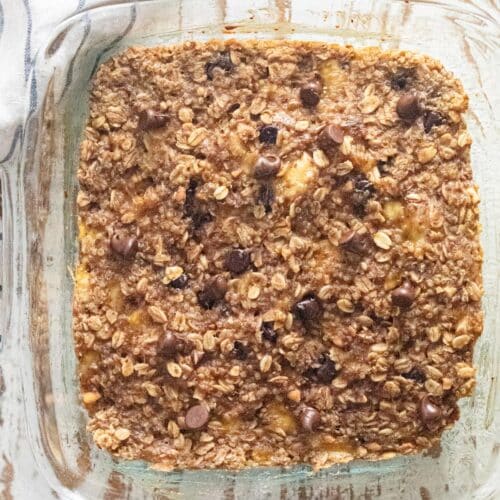
If you are looking for more healthy breakfast ideas you must try Oatmeal Breakfast Bars and my Spinach and Avocado Omelette.
Table of contents
Ingredients
You will need the following ingredients to make this healthy breakfast.

- 4 large eggs - 2 for each person
- 1 cup freshly grated parmesan
- salt and ground black pepper- to taste
- Everthing Bagel Seasoning - my favorite breakfast seasoning
How to make cloud eggs
Step-by-step directions on how to make delicious cloud eggs for breakfast!
Step 1 - Preheat oven to 450 degrees Fahrenheit and line a baking sheet with parchment paper. Carefully separate the egg whites from the yolks. Be gentle with the yolk because you will place them back into the "clouds" later. Keep the yolks in a separate bowl and the whites in a large mixing bowl.
Step 2 - Using a whisk, electric whisk, or electric mixer, beat the egg whites until they form stiff peaks. This means that when you lift the whisk, the egg whites should stand up firmly without collapsing.

Step 3 - Fold in a pinch of salt and pepper. You can also add in cheese, herbs, or crumbled bacon at this stage for an extra boost of flavor. This is where I fold in the Everything Bagel Seasoning and the parmesan cheese.
Step 4 - Shape the clouds by spooning the whipped egg whites onto the prepared baking sheet in mounds. Use the back of the spoon to create a small well in the center of each. This is where the yolk will sit.

Step 5 - Bake the whites for 3 minutes. This step will help them hold their shape and start to firm up. Carefully place a yolk into each well. Return the baking sheet to the oven and bake for another 3-4 minutes, depending on how runny you like your yolk. Less time = runnier yolk.
Step 6 - Remove from the oven and serve immediately. Garnish with more herbs, avocado, toast, or your favorite breakfast side.

Substitutions and Variation
Variations - Here are some delicious add ins to mix into your cloud eggs. ¼ pound deli ham, ripped into pieces, ½ cup chopped mushroom from my Mushroom Burger recipe, 2 pieces of turkey bacon chopped up into pieces or turkey sausage also cut up into pieces.
Tips and FAQ's
Cloud eggs, also known as "egg clouds," are a fun and visually stunning way to enjoy eggs. They consist of whipped egg whites baked with an egg yolk nestled in the center. When baked, the egg whites puff up like fluffy clouds, creating a light, airy texture that contrasts perfectly with the rich and creamy yolk.
Use room-temperature eggs for easier whipping!
Fresh eggs whip up better and hold their shape more firmly.
More Healthy Breakfast Recipes You Will Also LOVE


If you give this recipe a try don't forget to rate the recipe below! Always love hearing what you all think. You can also Stay in touch with me through social media on @Instagram, Pinterest, and Facebook. Don't forget to tag me when you try one of my healthy recipes!

Cloud Eggs
Equipment
- small mixing bowls
- baking pan
- electric hand mixer or whisk
- parchment paper
Ingredients
- 4 large eggs
- 1 cup freshly grated parmesan
- salt to taste
- ground black pepper to taste
- everything but the bagel seasoning to taste
Instructions
- Step 1 - Preheat oven to 450 degrees Fahrenheit and line a baking sheet with parchment paper. Carefully separate the egg whites from the yolks. Be gentle with the yolk because you will place them back into the "clouds" later. Keep the yolks in a separate bowl and the whites in a large mixing bowl.
- Step 2 - Using a whisk, electric whisk, or electric mixer, beat the egg whites until they form stiff peaks. This means that when you lift the whisk, the egg whites should stand up firmly without collapsing.
- Step 3 - Fold in a pinch of salt and pepper. You can also add in cheese, herbs, or crumbled bacon at this stage for an extra boost of flavor. This is where I fold in the Everything Bagel Seasoning and the parmesan cheese.
- Step 4 - Shape the clouds by spooning the whipped egg whites onto the prepared baking sheet in mounds. Use the back of the spoon to create a small well in the center of each. This is where the yolk will sit.
- Step 5 - Bake the whites for 3 minutes. This step will help them hold their shape and start to firm up. Carefully place a yolk into each well. Return the baking sheet to the oven and bake for another 3-4 minutes, depending on how runny you like your yolk. Less time = runnier yolk.
- Step 6 - Remove from the oven and serve immediately. Garnish with more herbs, avocado, toast, or your favorite breakfast side.
Notes
- Crack the eggs into separate bowls (you can help separate the whites from yolks).
- Pour ingredients into bowls (like cheese or herbs).
- Help whip the egg whites using a hand mixer (with assistance).
- Fold in mix-ins like cheese, herbs, or spices
Nutrition

Jillian is the creator of Jillian's Healthful Eats. She is the one who cooks all the meals, develops all the recipes, takes all the photographs, and washes all the dishes! She is a very busy wife and mother of 4 who enjoys cooking with her children and instilling in them her love for health and nutrition!
It's a pity you don't have a donate button! I'd certainly donate to this excellent blog! I guess for now i'll settle for bookmarking and adding your RSS feed to my Google account. I look forward to new updates and will share this site with my Facebook group. Talk soon!
I wanted to thank you for this great read!! I definitely enjoying every little bit of it I have you bookmarked to check out new stuff you post…
These look great as I have never heard of them before. Looking forward to giving them a try this week. I will be sure to provide an update
Thanks John 🙂